How to cut balsa wood for model rocket fins cleanly
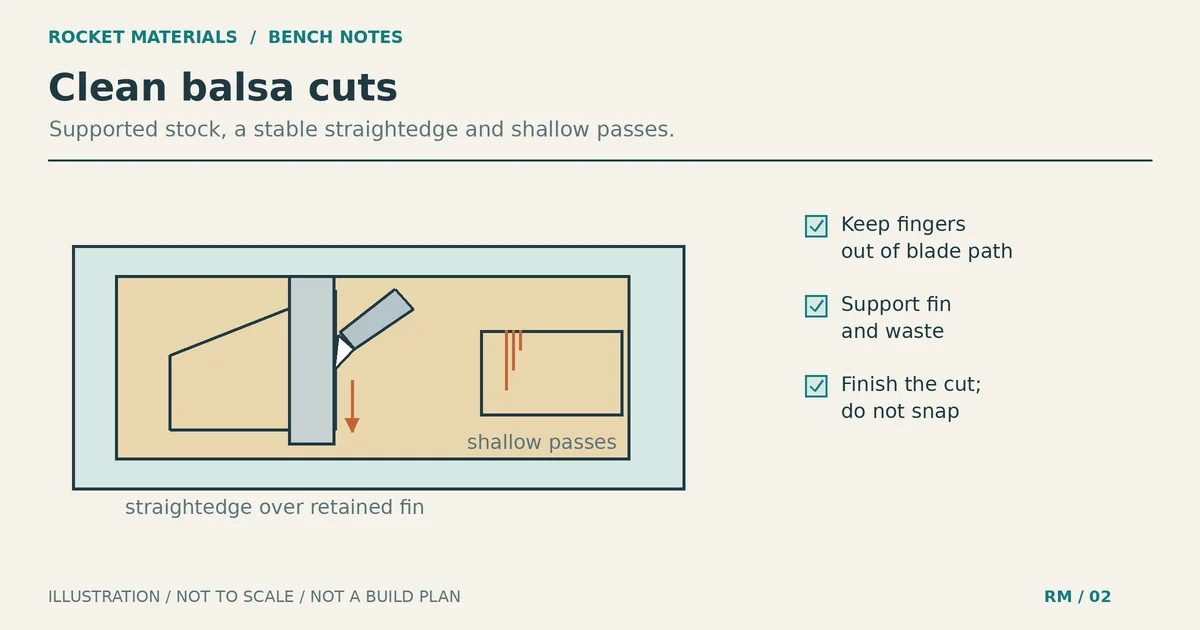
To cut balsa wood for model rocket fins, use a sharp hobby knife, a metal straightedge and a flat cutting surface. Score the outline lightly, then deepen the same cut with repeated shallow passes. Keep the ruler over the fin you want to keep, and cut until the wood separates without bending it. That is the method demonstrated in Apogee’s balsa fin cutting tutorial.
The frustrating part is usually a torn corner or a blade that wanders off the line. Pressing harder is tempting, but it makes the cut harder to control. If you’re learning how to cut balsa wood, concentrate on a stable setup and a repeatable stroke before trying to work faster.
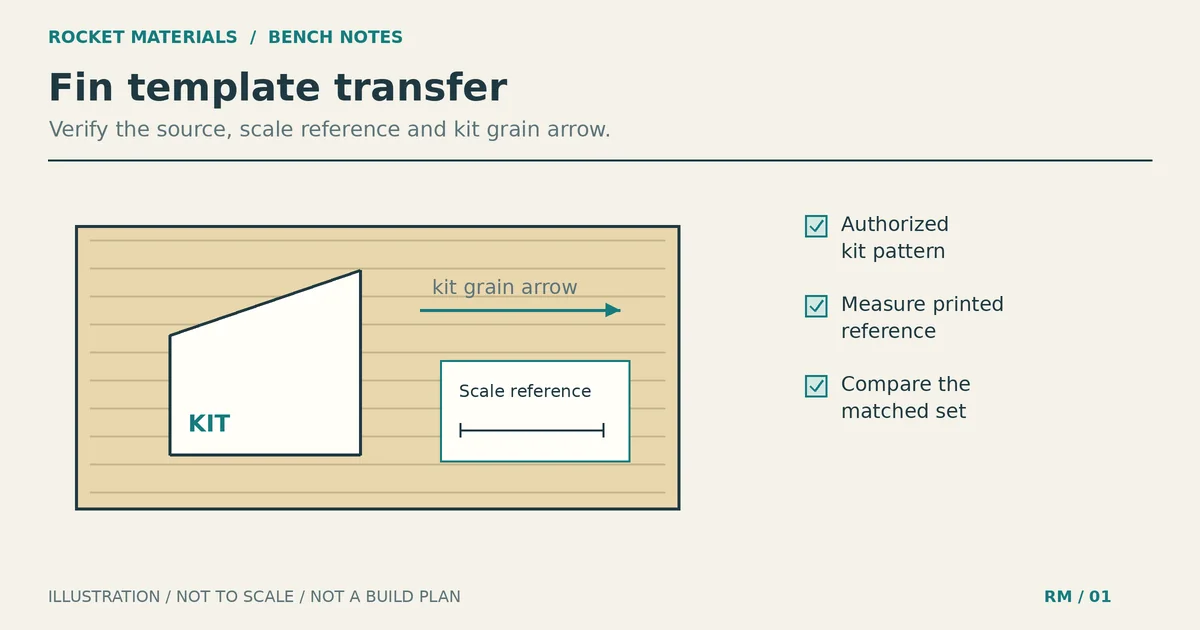
Start with the fin shape and stock specified by your kit or plan, and follow its current instructions if they differ from general advice. The steps below are for straight-sided fins cut from a blank sheet. If your fins are already precut, skip to the release and inspection section.
Set up the knife and cutting surface
You need a hobby knife with a sharp, securely fitted blade, a metal ruler or cutting straightedge, a cutting mat or suitable flat cutting board, and your marked balsa sheet. Keep the kit instructions and original pattern nearby. Fine sandpaper on a sanding block is useful for the small amount of cleanup after cutting.
Place the sheet flat on the cutting surface so both the fin and surrounding waste have support. Don’t hold the wood in the air or cut across the edge of the table. The Estes Model Rocketry Technical Manual calls for a cutting board beneath the knife and warns against leaving the knife lying around after use.
Keep your holding hand behind the straightedge’s cutting edge, with fingers out of the blade’s path and its possible runout. Arrange the sheet so the stroke travels away from your body. Put the knife down safely before repositioning the wood or ruler. Young builders should have adult supervision for knife work; an adult should take over if the child cannot maintain a safe grip and clear hand position.
Replace a dull or damaged blade following the knife maker’s instructions. Don’t try to compensate for a dragging blade by leaning harder on it. Excel Blades’ manufacturer guide to cutting balsa recommends a sharp blade, a cutting mat and keeping fingers clear of the cut.
Check the marked outline before cutting
Use the kit’s specified shape and stock rather than changing the fin to make the cutting job easier. If you’re still deciding between woods, the balsa versus basswood fin comparison covers that separate decision.
Check that every outline is complete and that the root edge, which will attach to the rocket, is clearly identified. Confirm the pattern’s orientation against the kit instructions. For help with that layout question, use the fin grain-direction guide before making the first cut.
A broken pencil line or ambiguous corner is easier to fix now than after the blade has passed through it. Compare the marked outline with the original pattern, especially where two edges meet. Don’t choose a new outline halfway through a cut because an earlier stroke wandered.
How to cut balsa wood with a hobby knife
1. Put the straightedge over the fin
Align the ruler with the edge you are cutting, with the ruler resting on the retained fin area and the waste exposed beside it. Apogee demonstrates this placement because a blade that strays away from the ruler then moves into the waste rather than into the fin.
Hold the ruler firmly enough to prevent movement, without crushing the sheet. Before cutting, check that you can complete the stroke without reaching awkwardly or moving your holding hand into the path. If not, rotate the sheet and reset the ruler while the knife is safely set aside.
2. Make a light first score
Draw the blade along the straightedge with light pressure. The first pass establishes the cut; it does not need to release the fin. Keep the blade upright across the sheet so the edge is square rather than beveled, while angling the handle back along the direction of travel.
The Estes manual distinguishes these two orientations: the blade is square to the surface across the cut, while the handle is inclined. It also notes that a dull blade or a handle held too high can tear balsa. Apogee’s demonstration shows the knife posture if the written description is difficult to picture.
Try the motion on an offcut first if the grip is unfamiliar. Practice away from the marked fins, using the same supported setup and safe hand position.
3. Follow the same cut with shallow passes
Repeat the stroke in the existing groove. Keep the ruler stationary and let each pass deepen the cut gradually. Both Apogee’s cutting demonstration and Excel Blades recommend several light passes rather than forcing a single deep cut.
Don’t aim for a fixed number of passes. Apogee’s demonstration uses different counts on different edges; those are examples, not a rule for every sheet. Continue only while the blade moves under control. If resistance makes you strain, stop and check the blade, ruler placement and support.
Watch for thin shavings beside the groove. In the Apogee tutorial, shavings indicate that the blade is not following the same channel each time. Pause and inspect the line rather than carving away more wood with each stroke.
4. Finish the cut before releasing the fin
Cut each straight edge as a separate operation. At a corner, finish at the intended intersection; don’t sweep the knife around the corner while it is still embedded. Set it down, reposition the sheet and align the ruler for the next edge.
After cutting the perimeter, check whether the fin separates freely. If a small area remains connected, return the sheet to the cutting surface and finish that section with the knife. Don’t bend the fin back and forth to break the remaining fibers. If you have to pull it free, check for an unfinished cut.
Once released, set the fin aside flat. Keep the original pattern for comparison, and repeat the process for the rest of the set.
When the cut tears, wanders or refuses to finish
Stop at the first sign of a problem. A small rough area outside the final outline may allow light cleanup; a cut inside the intended outline needs a closer check against the plan. The responses below combine the manufacturers’ cutting advice with conservative inspection decisions.
| What you see | What to do next |
|---|---|
| The blade drags and tears the edge. | Check for a dull blade and an overly upright handle. Replace the blade if needed, then return to light passes. Don’t add force. |
| Shavings appear along a widening cut. | Check that the ruler hasn’t moved and that each pass follows the same groove. Re-establish alignment before continuing. |
| The ruler slips during a stroke. | Stop cutting. Reset the sheet and straightedge, keeping fingers clear. Inspect the fin outline for any damage before restarting. |
| The fin is almost free but catches at one point. | Support it flat and cut the remaining connection. Don’t snap it out. |
| A corner splits or the cut enters the fin. | Compare it with the specified outline. If restoring the edge would change that shape, remake the fin rather than quietly shrinking it. |
| Controlled light passes are not workable. | Stop forcing the knife. Estes and Excel Blades identify a razor saw as an alternative for stock that needs it; follow the kit and tool instructions. |
A curved outline requires a different cutting approach. Don’t force a straight ruler to guide a curve or replace the curve with straight cuts that change the design. Apogee links a separate curved-fin tutorial from its straight-fin cutting lesson.
Release precut fins and check the finished set
If the kit supplies precut fins, you usually need to sever the small bridges holding them in the sheet rather than cut a new perimeter. Keep the sheet supported and cut those attachment points carefully. Estes specifically describes using a modeling knife to release die-cut fins before stacking them for edge sanding.
For fins cut from a blank, compare each one with the original pattern first. Then align the fins in a stack to inspect their outlines. Don’t use a damaged first fin as the new pattern for all the others, and don’t knife-cut a stack to save time.
Use a sanding block lightly to remove small cutting roughness and bring the set into agreement with the specified outline. The Estes manual’s fin preparation sections recommend stacking fins and sanding edges square. Keep the root edge straight and square; its shaping guidance explicitly says not to round that attachment edge. Save any further edge shaping for the step specified in your kit instructions.
Before putting the knife away, check for uncut connections, cracks, missing corners and cuts that crossed inside the outline. Look along the root edge for obvious irregularities. A matched stack is a workmanship check, not proof that a rocket design is stable or ready to fly.
When the fins match the pattern and have intact, clean edges, move on to the kit’s attachment instructions. The fin alignment and inspection guide covers that next stage. Finish cutting and checking the whole set before gluing any of it to the rocket.